Google Workspace mailboxes are one of the best solutions for cold email campaigns. They have excellent deliverability rates and are rarely blocked.
If you’ve already created your mailboxes and now want to connect them to Coldy, follow this step-by-step guide:
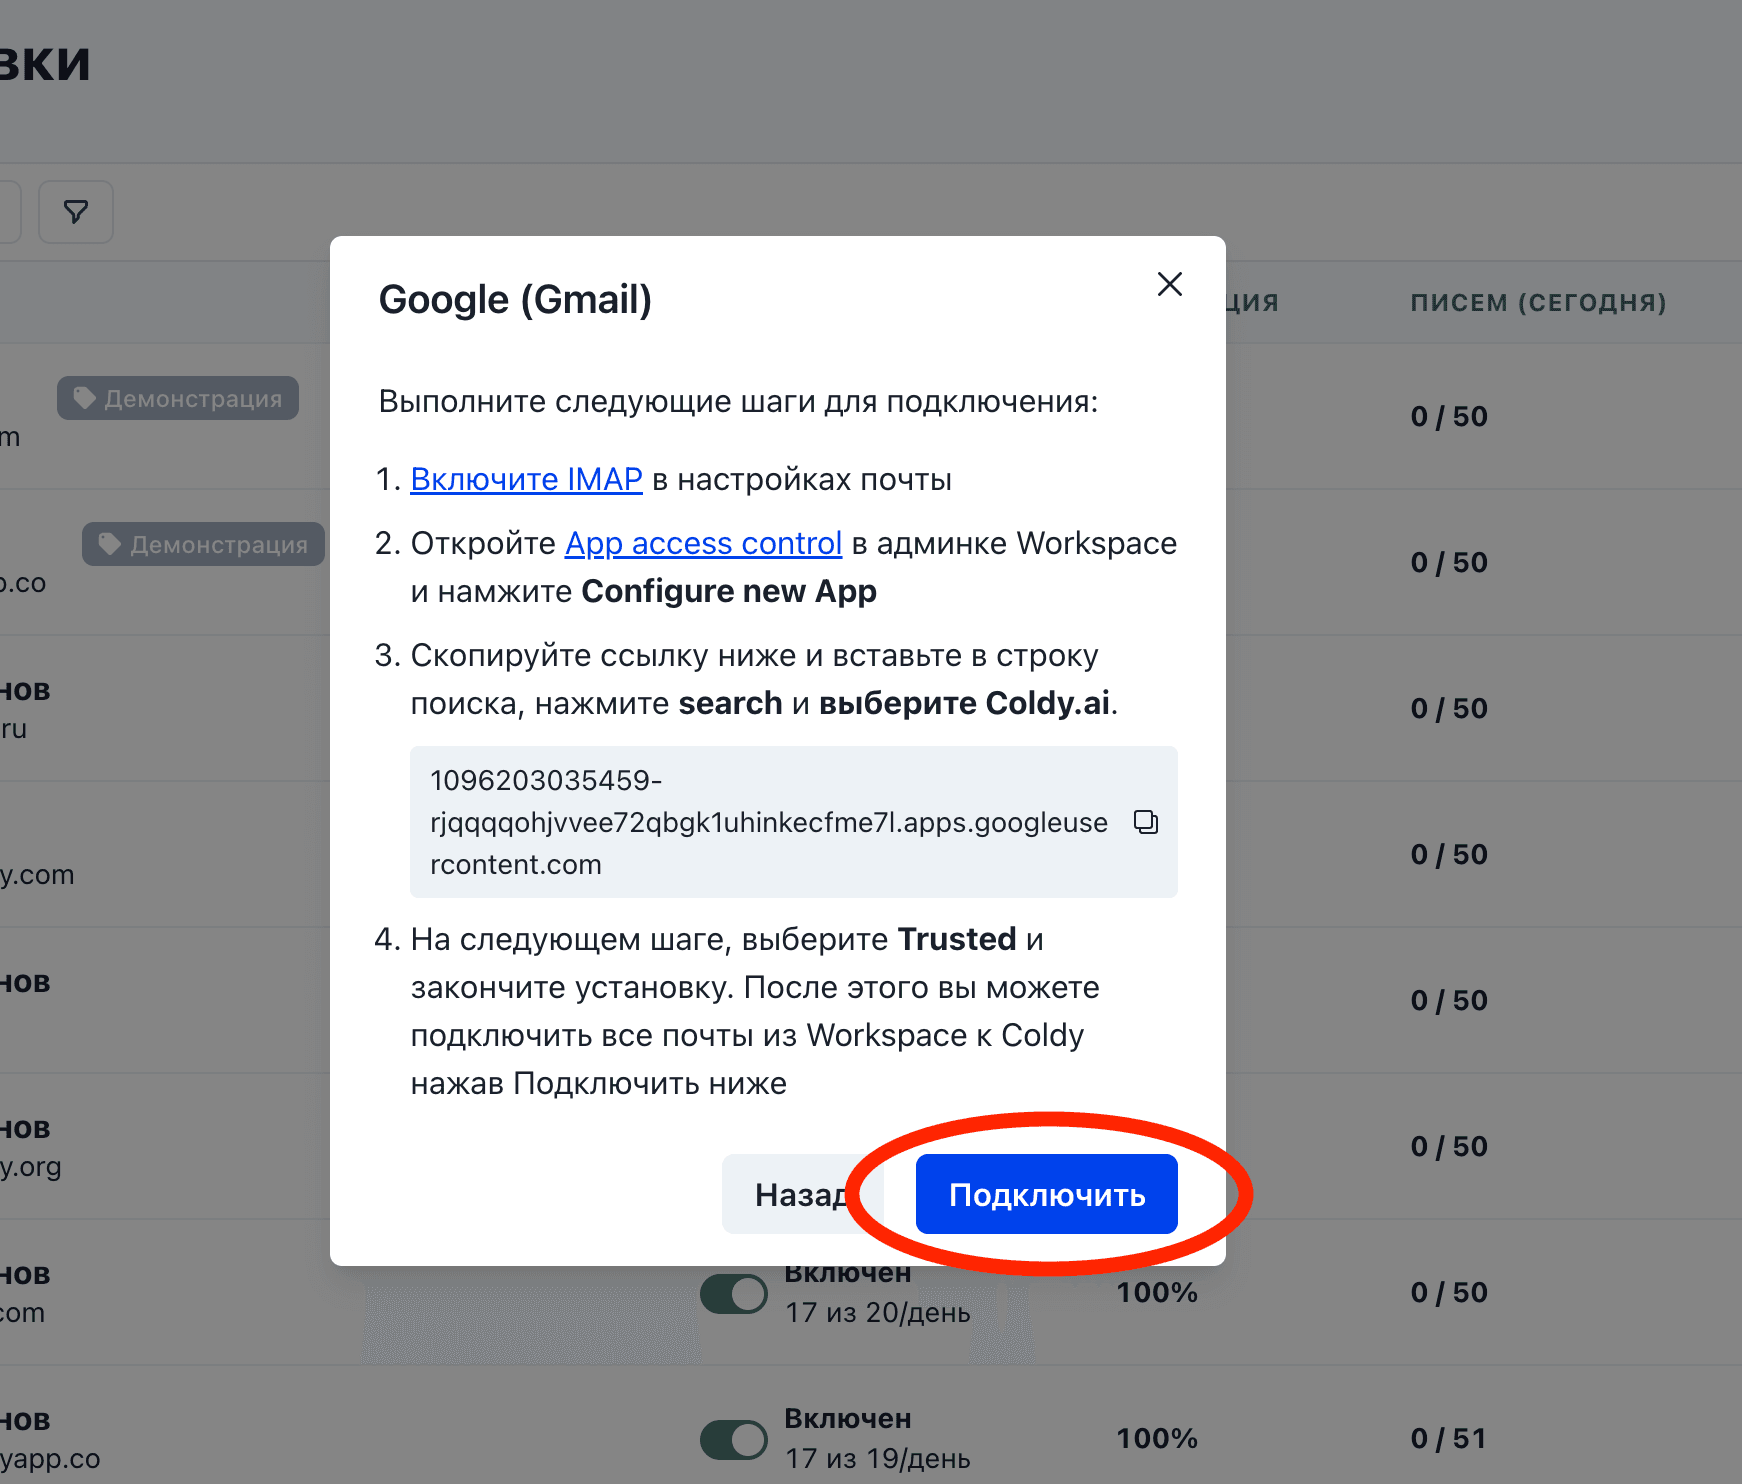
Go to the Sending Mailboxes page in Coldy and click Connect Mailbox, then select Google. A popup with connection instructions will appear
Click on the App Access Control link and log in as your Workspace administrator. Then click Configure new app
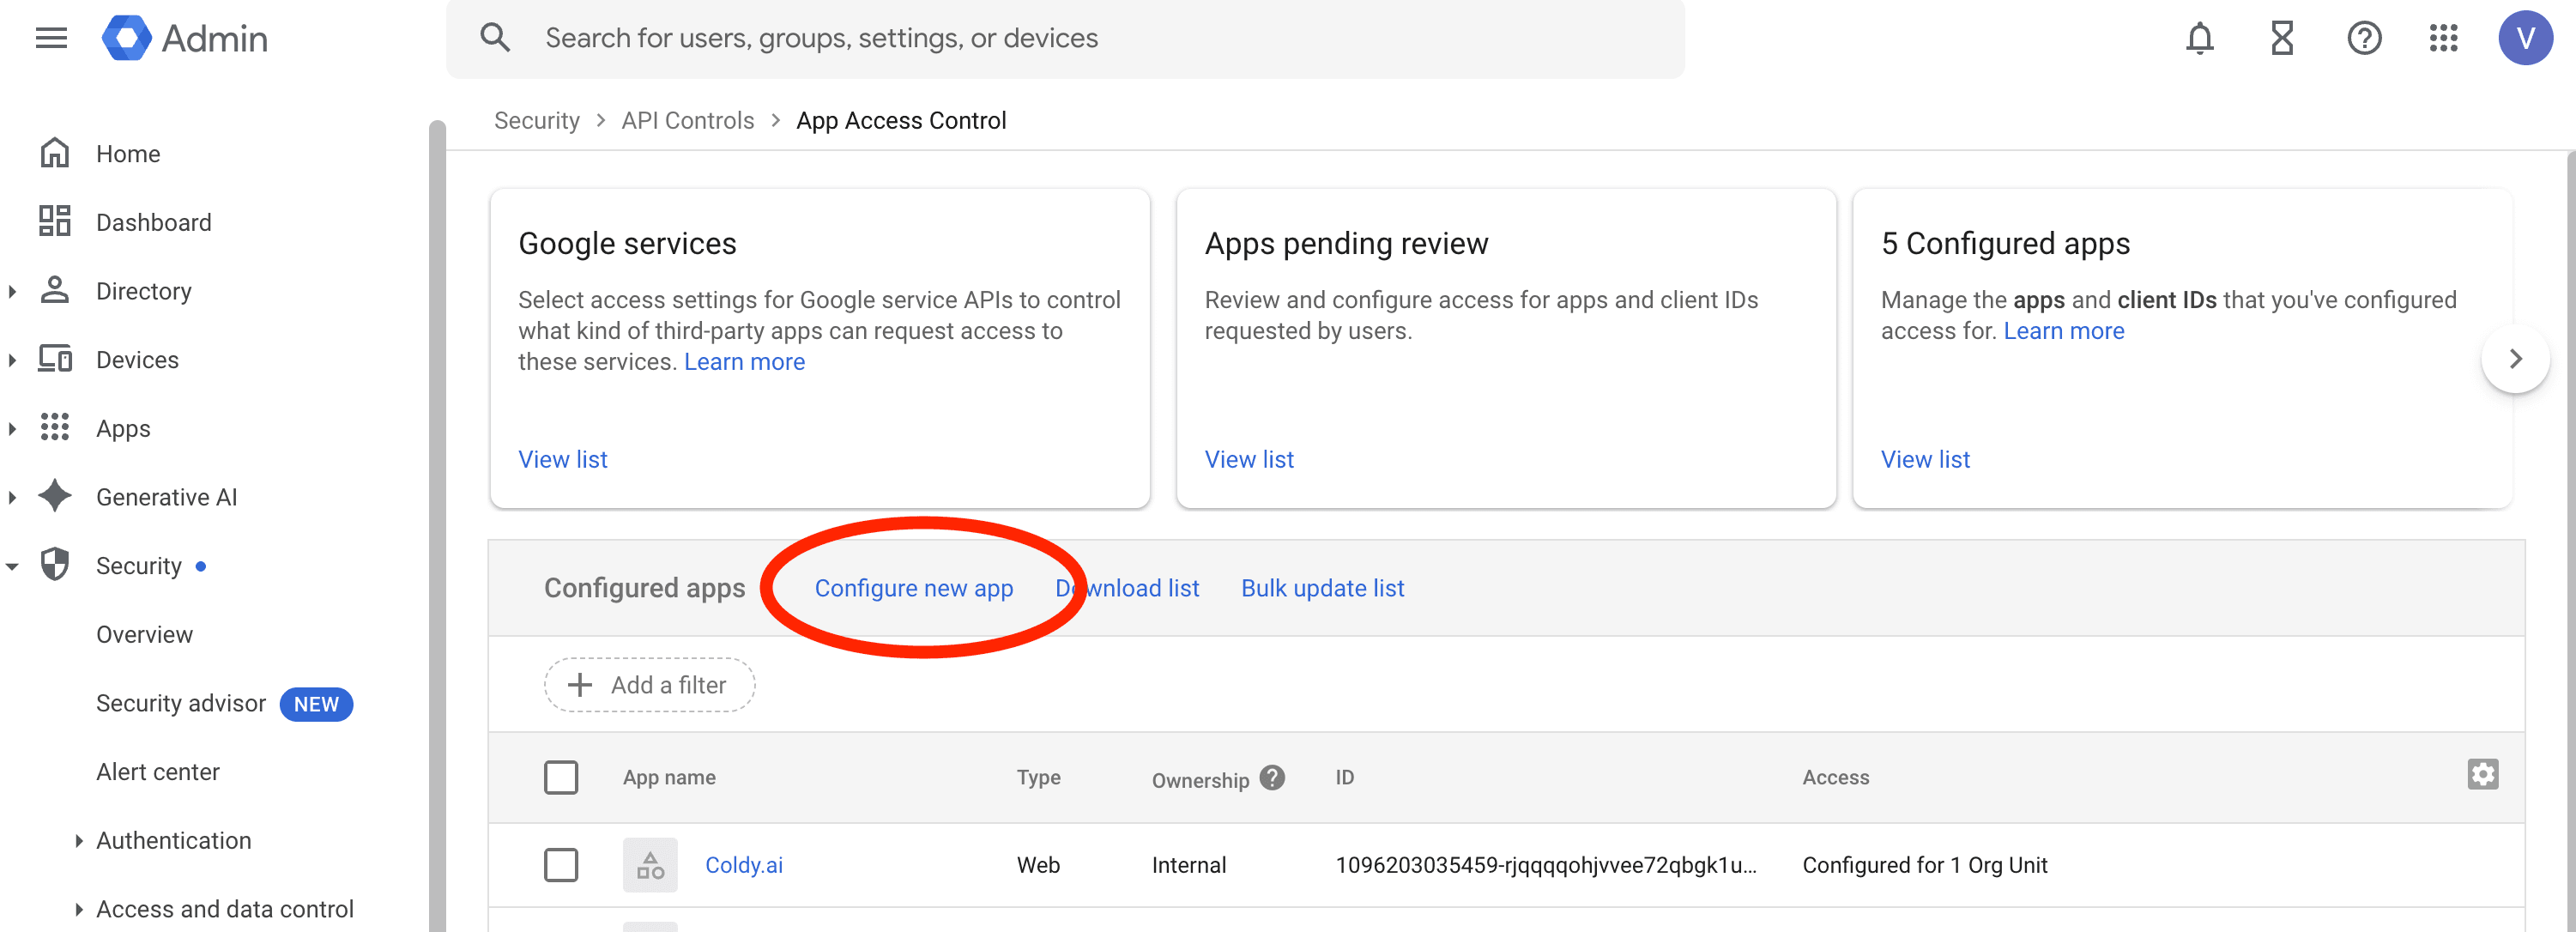
In the window that opens, paste the link from Step 3 of the Coldy popup and press Search. From the list, select Coldy.ai.

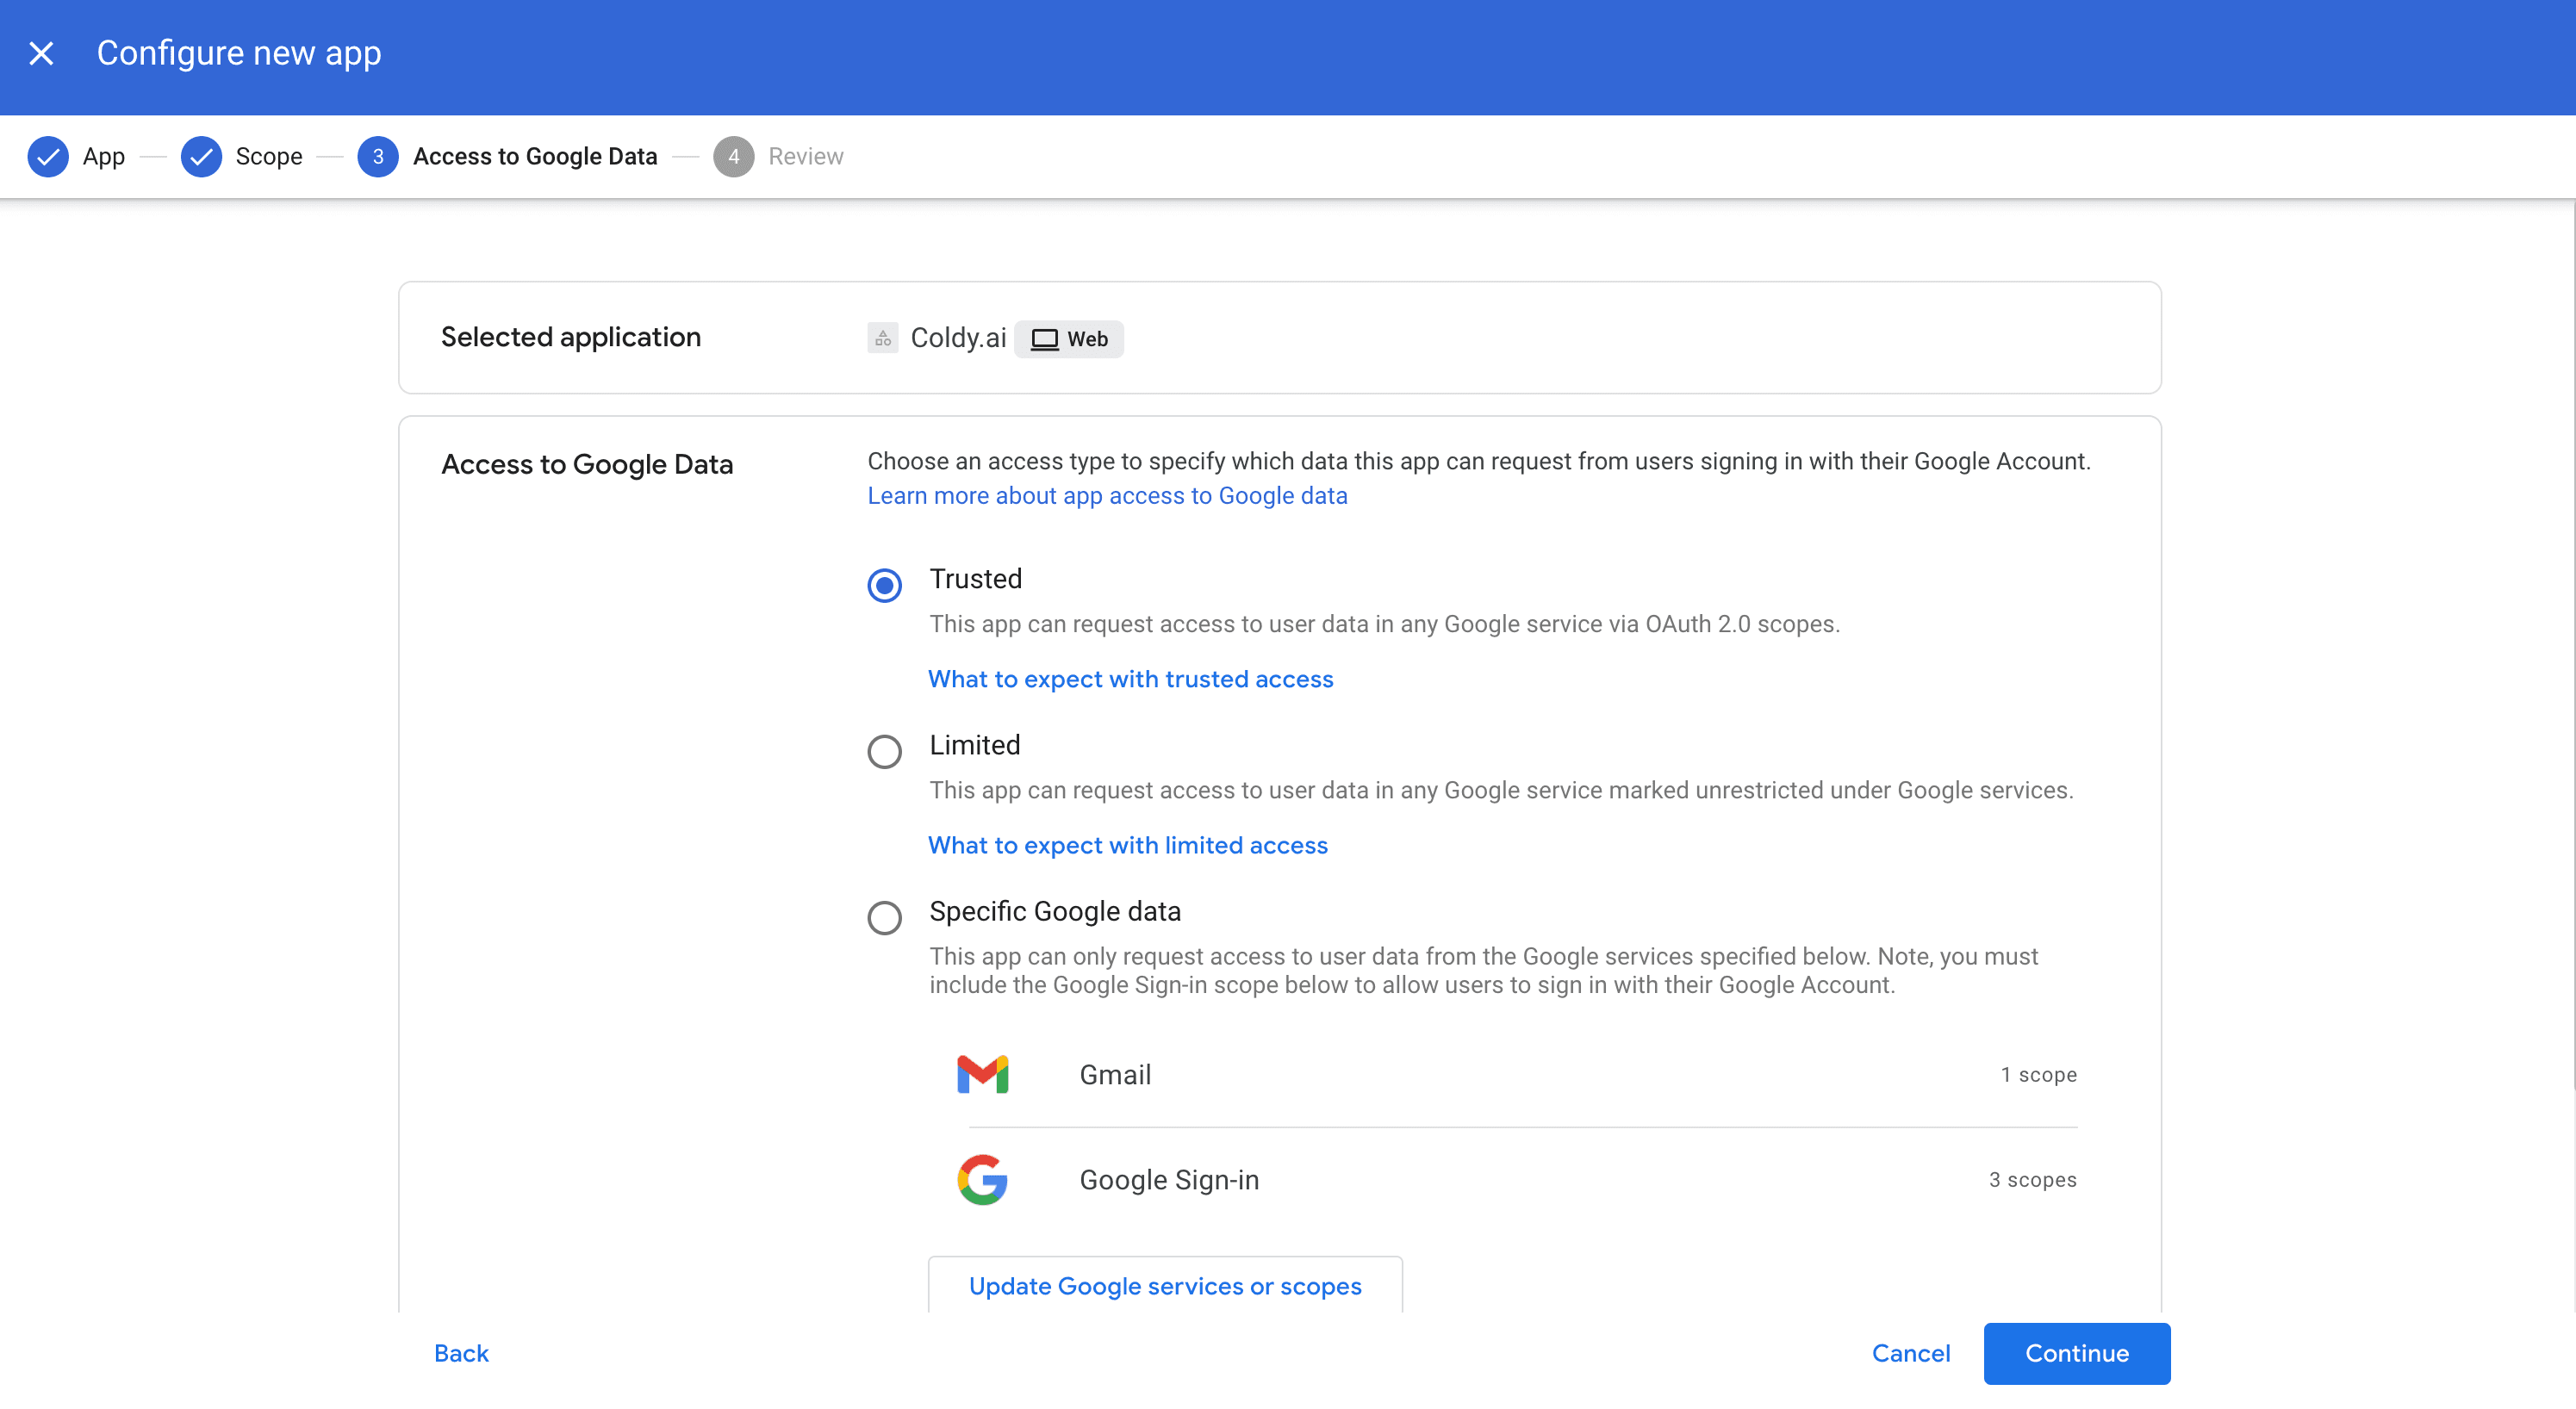
On the Scope step, choose All in {{your company name}}. On the Access to Google data step, select Trusted (as shown in the screenshot) and click Continue. On the Review step, press Finish in the bottom right corner
Return to Coldy and click Connect. Choose the account you want to connect and confirm access. If the mailbox is connected successfully, everything has been set up correctly. From now on, you can connect all other mailboxes under this Workspace in the same way. You don’t need to go through the first four steps again.