Без правильных настроек DNS записей наши письма могут улететь в спам. Записи, которые мы будем настраивать в этом гайде:
SPF предотвращает подделку вашей электронной почты.
DKIM добавляет цифровую подпись к электронным письмам для проверки подлинности и предотвращения подмены ваших ящиков.
DMARC улучшает безопасность электронной почты путем комбинирования SPF и DKIM, а также предоставляет инструкции по обработке подозрительных электронных писем.
MX запись о вашем почтовом сервисе, без нее почта работать не будет. Если вы уже создали аккаунт на Яндекс360 или Google Workspace, то эта запись уже присутствует.
MX
Эта запись уже будет присуствовать после того как вы создадите Workspace на Google или Microsoft. Если у вас до этого был подключен другой почтовый сервер, убедитесь что вы удалили все другие MX записи в DNS своего домена.
На случай, если записей на вашем домене, используйте эти гайды:
SPF
Google workspace
Microsoft 365
Эта запись скорее всего будет установлена по умолчанию, если по какой то причине ее нет, можете следовать официальному гайду.
Яндекс 360
Мы советуем делегировать DNS домена Яндексу 360. В таком случае записи MX, DKIM и SPF будут настроены автоматом. Процесс делегации домена может занять около одного дня, так что возможно придется взять паузу в настройке почты.
DKIM
Google Workspace
Microsoft 365
Яндекс 360
Настроится автоматически после делегирования домена
DMARC
Настраивается для всех провайдеров одинаково:
Зайдите на https://powerdmarc.com/ru/dmarc-record-generator/
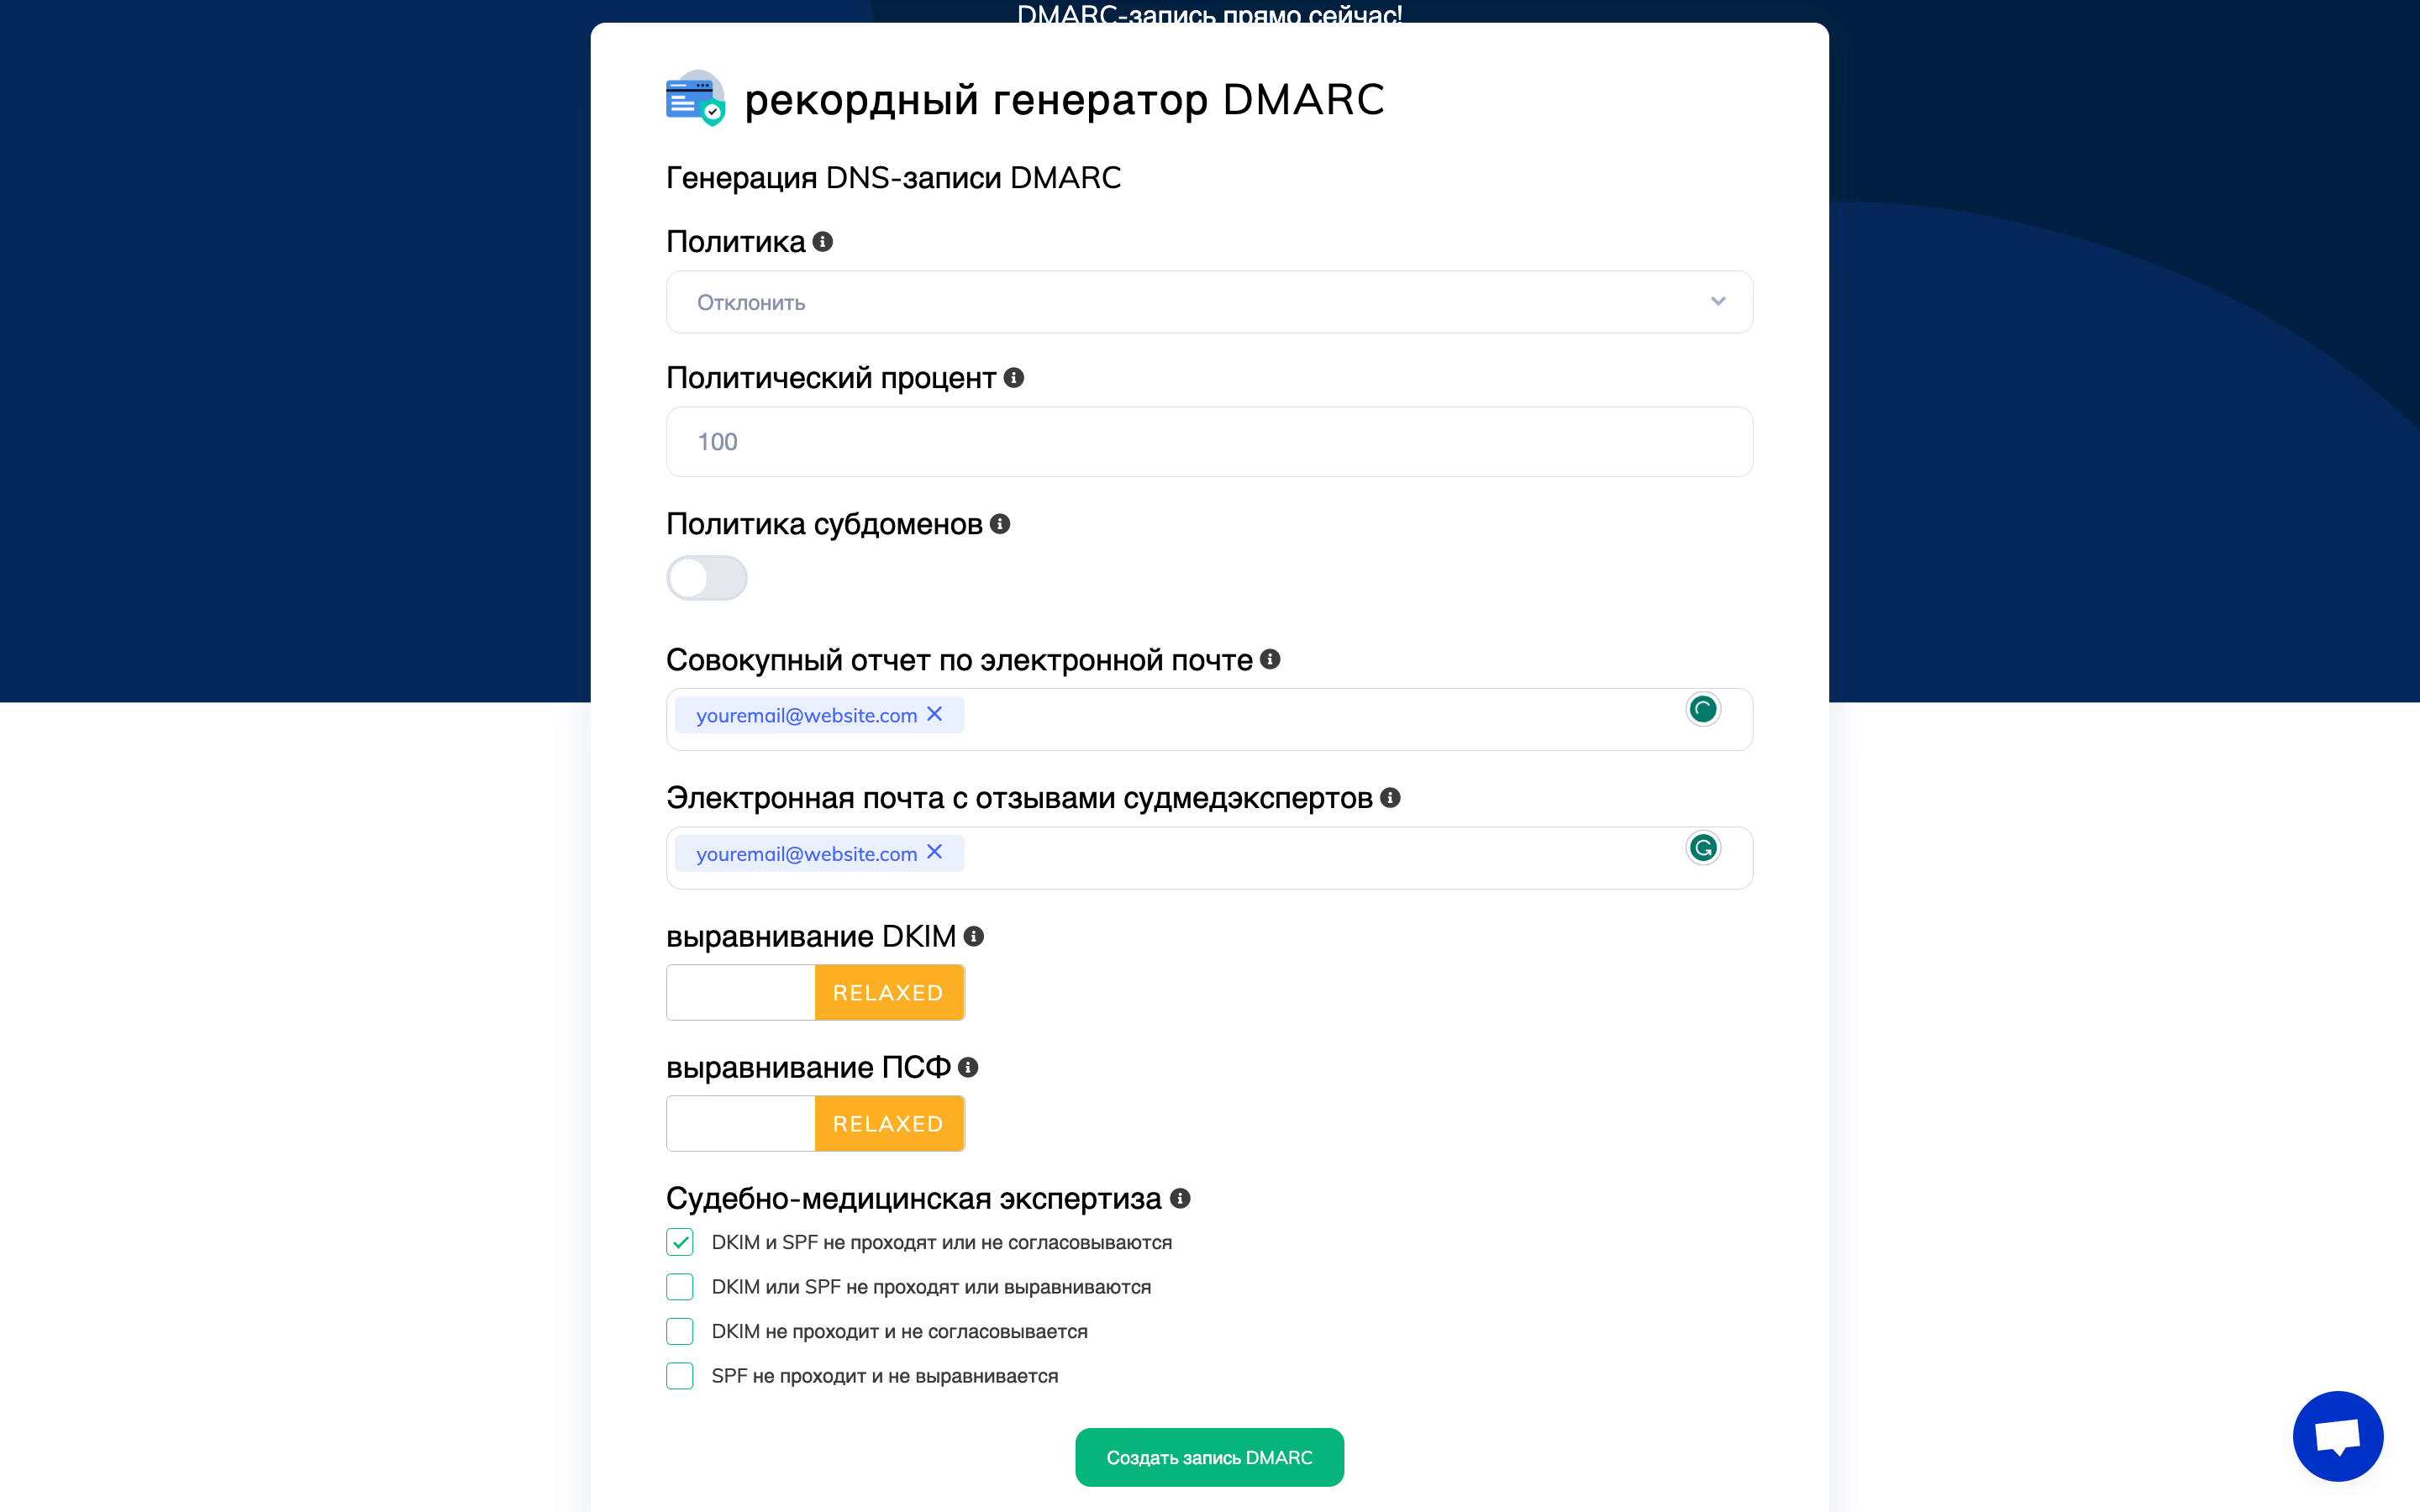
Введите настройки со скриношта ниже. Важно! Используйте свою почту вместо youremail@website.com

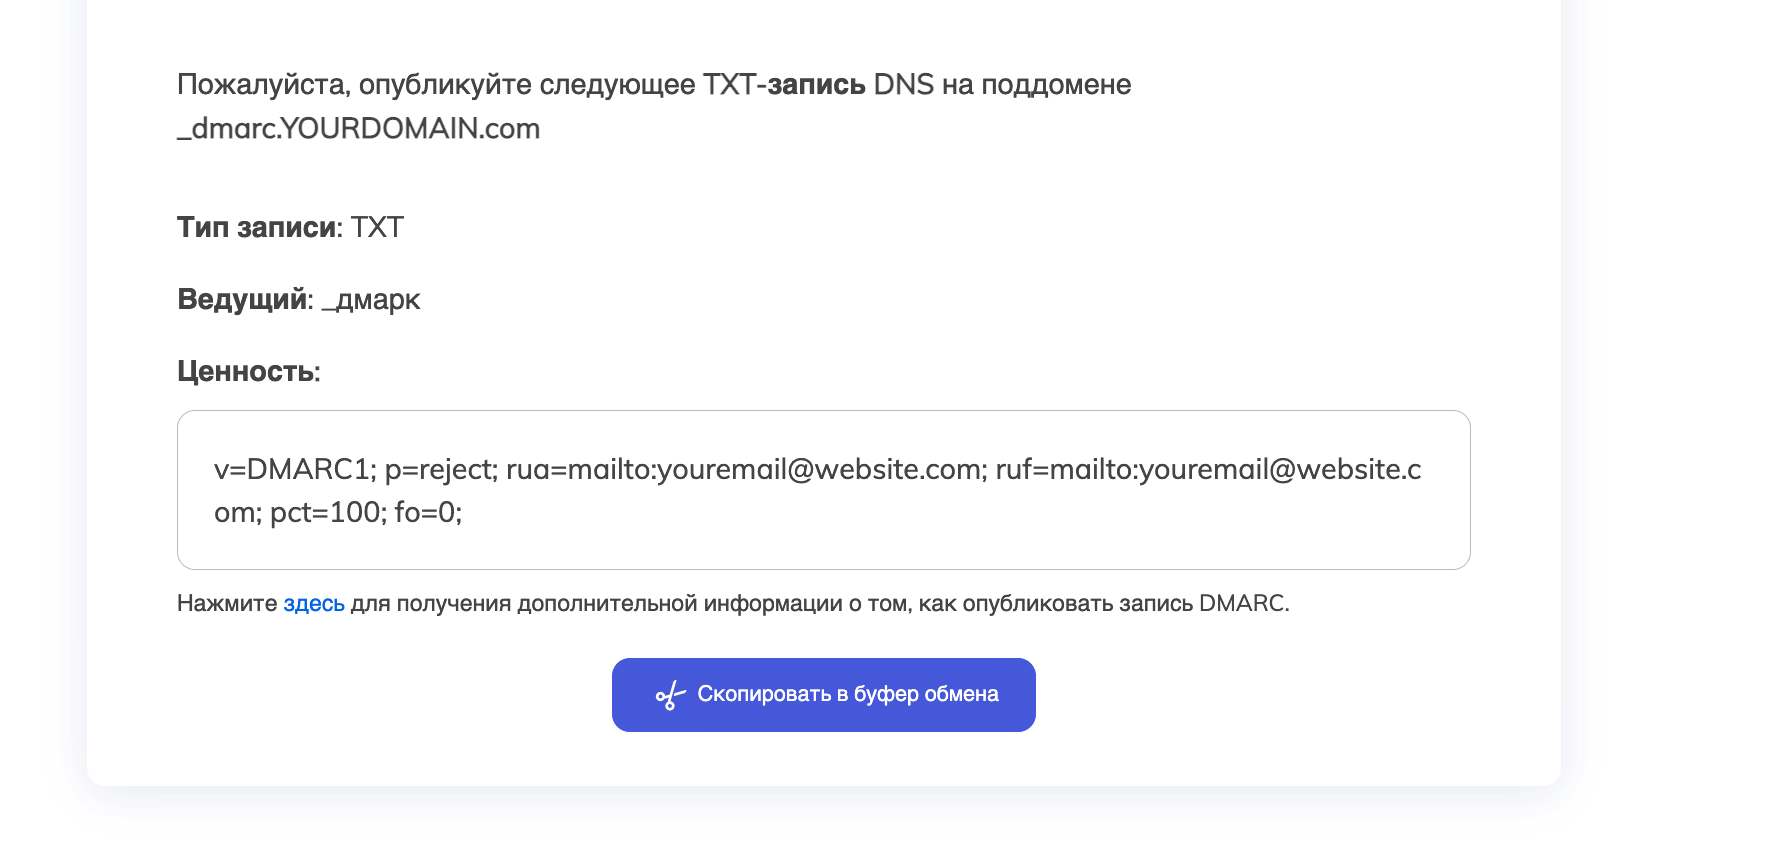
Нажмите “Создать запись DMARC” и скопируйте записи как на примере ниже:
⚠️ На сайте кривой перевод, ни в коем случае не вставляйте запись с русскими буквами
Тип записи: TXT
Хост(Ведущий): _dmarc
Значение (Ценность): v=DMARC1; p=reject; rua=mailto:youremail@website.com; ruf=mailto:youremail@website.com; pct=100; fo=0; (у вас тут будет другое значение)
Зайдите в настройки DNS записей вашего домена и вставьте запись DMARC
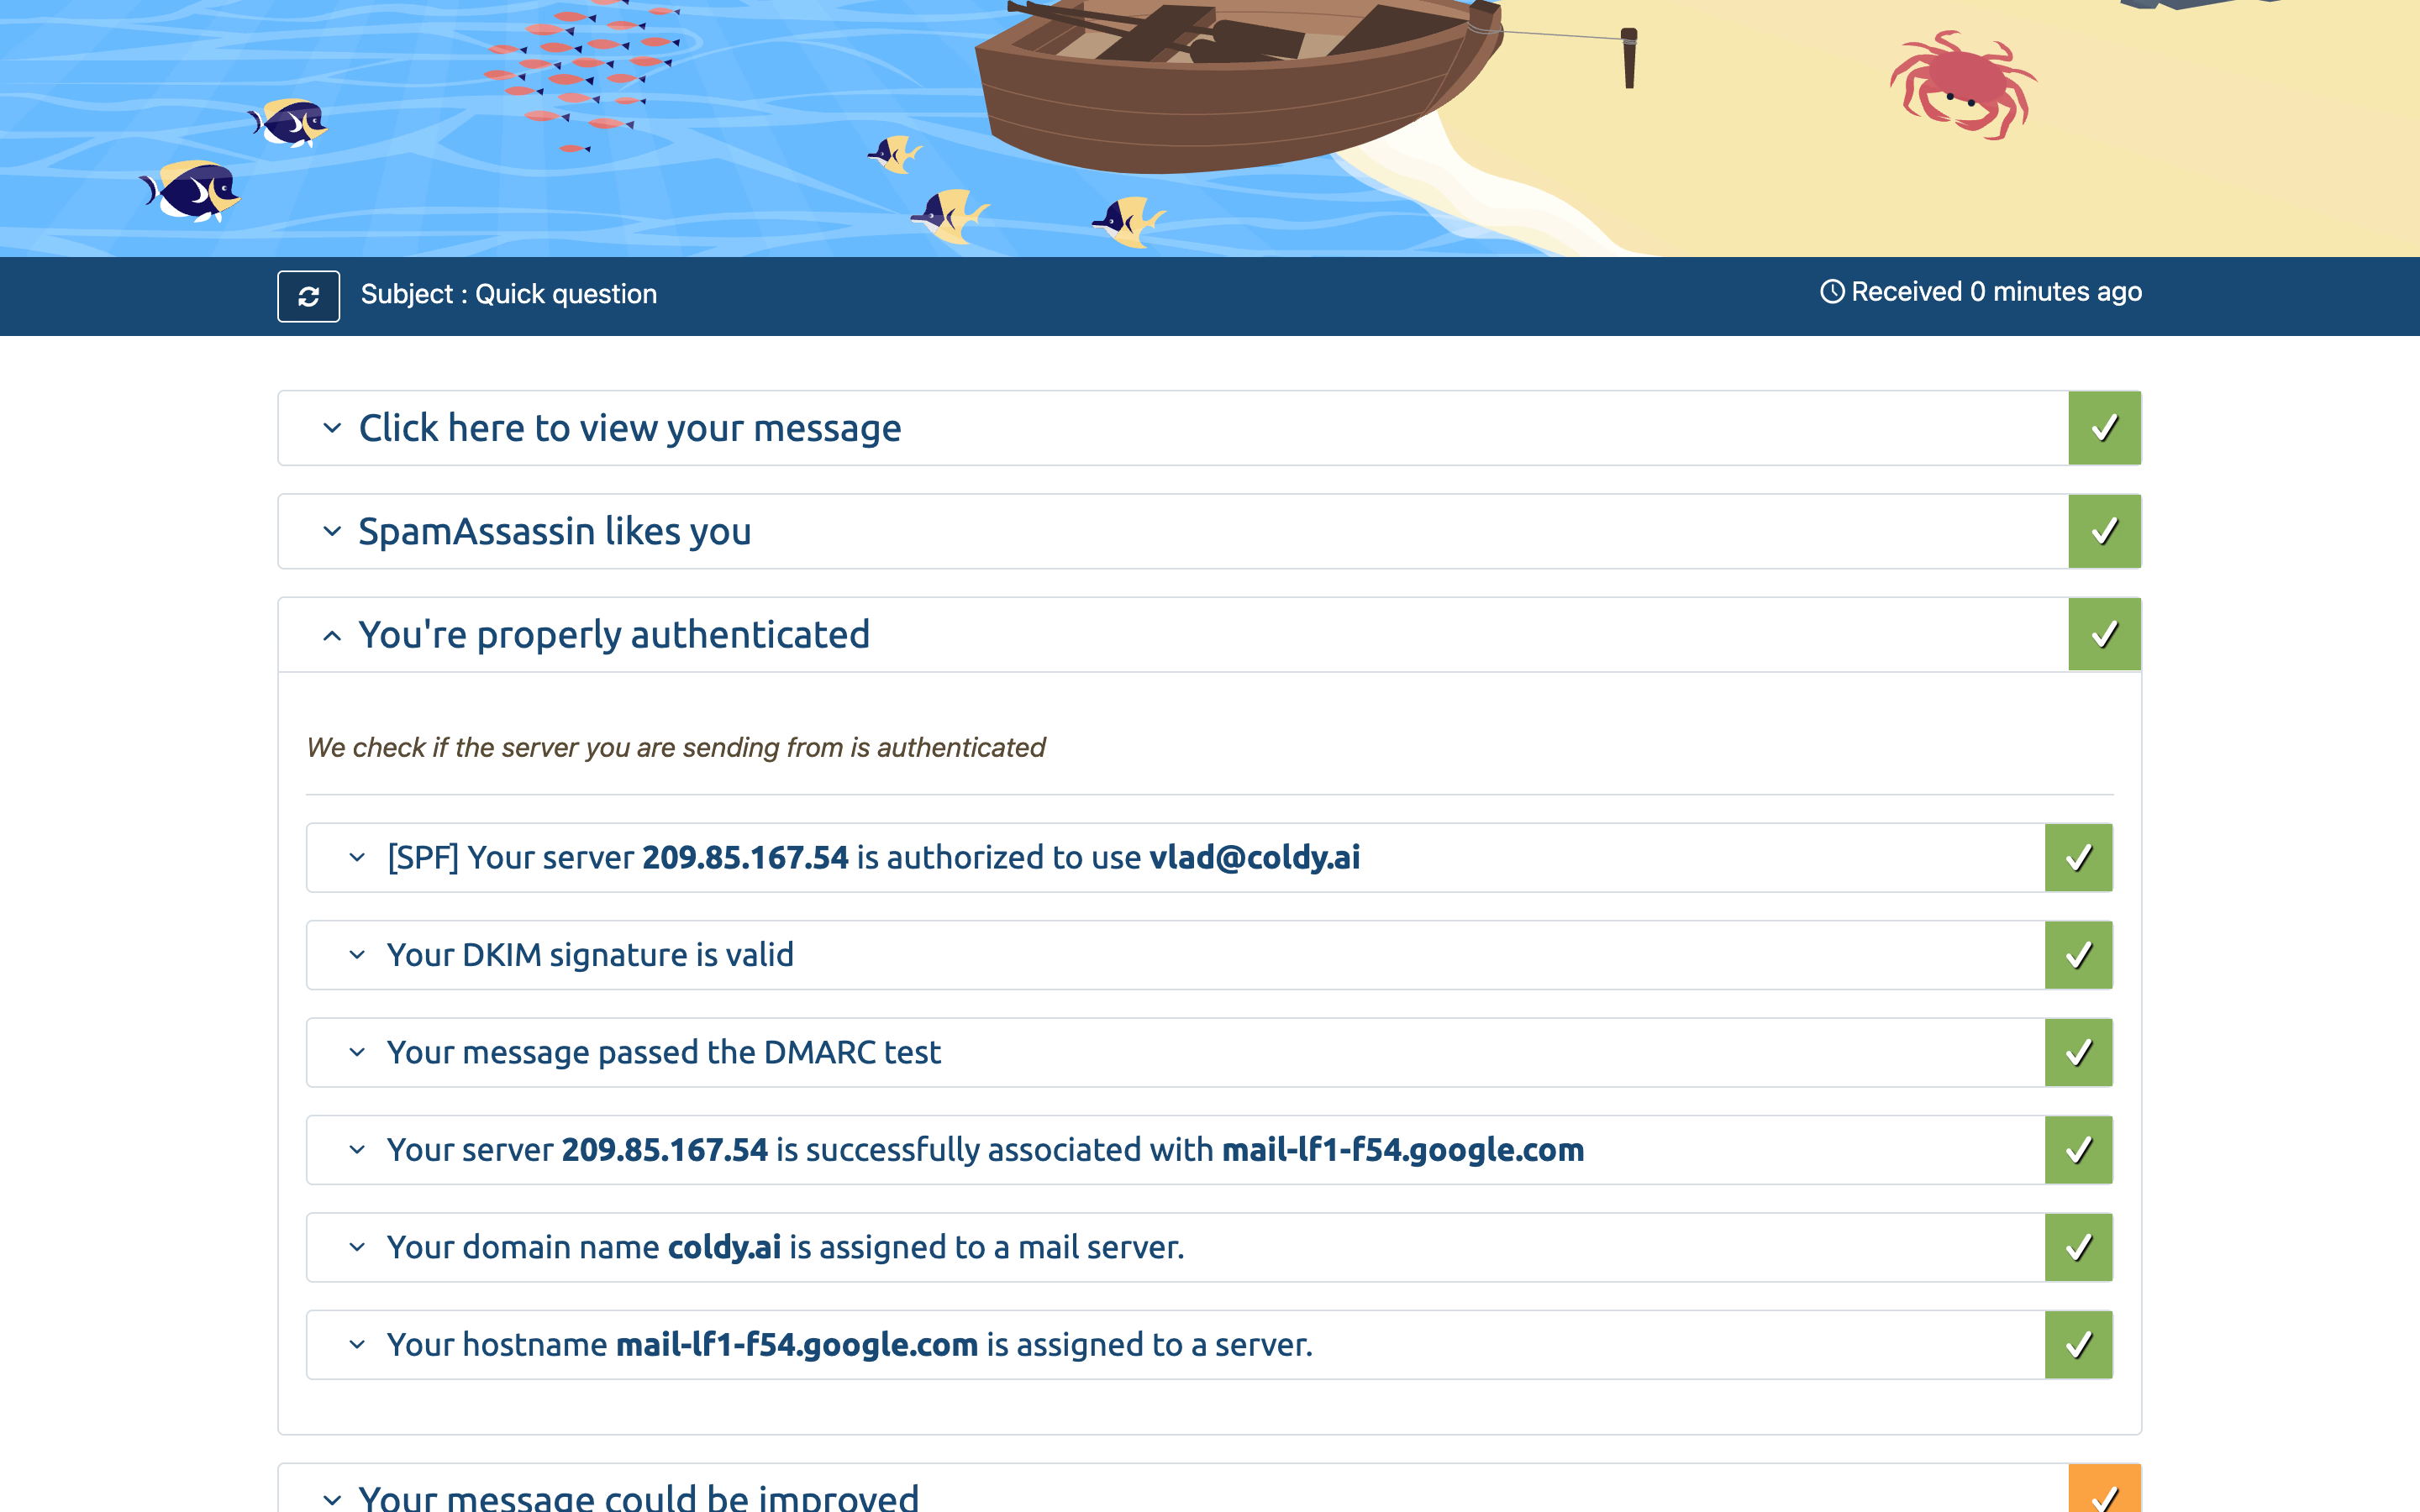
Проверяем правильность настроек
Чтобы проверить, все ли настроено правильно, можно воспользоваться сайтом mail-tester.com. Все, что вам нужно сделать, это отправить письмо на адрес, который они сгенерировали для вас, и вы увидите отчет со всеми потенциальными проблемами.


